


 This is my entry for our competition! Its pretty simple, no textures or advanced rendering- but I like it. In terms of modelling, I think its been sucessful but theres A LOT of room for improvement. Every time I complete one of these competitions I get a little bit better and a little bit more confident with how things are progressing, so bring on the next challenge!!
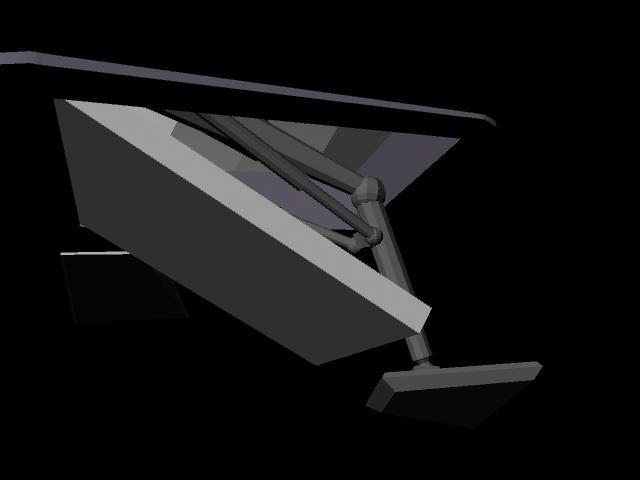 …some landing gear…. :P
 Rear door with some steps….
 With windscreen….. proved to be a bugger… but…. Why should that have been any different to the rest of the model ay? :P
 Another annoyingly awkward bit….making the space in the front for the window.
 Anyway…..mirrored the geometry and merged it to get me ship shape all ship shape…
 Did some basic cubey type shapes to create a bit of an interior….(think I changed these slightly since this version of the model…not much mind….but they are slightly different now.) .. oh yeah… theres also a gap there for the door…..that was the only bit that was straight forward :P
 The aforementioned door way… with frame!…and… some groovy lil fins on th rear of the craft…
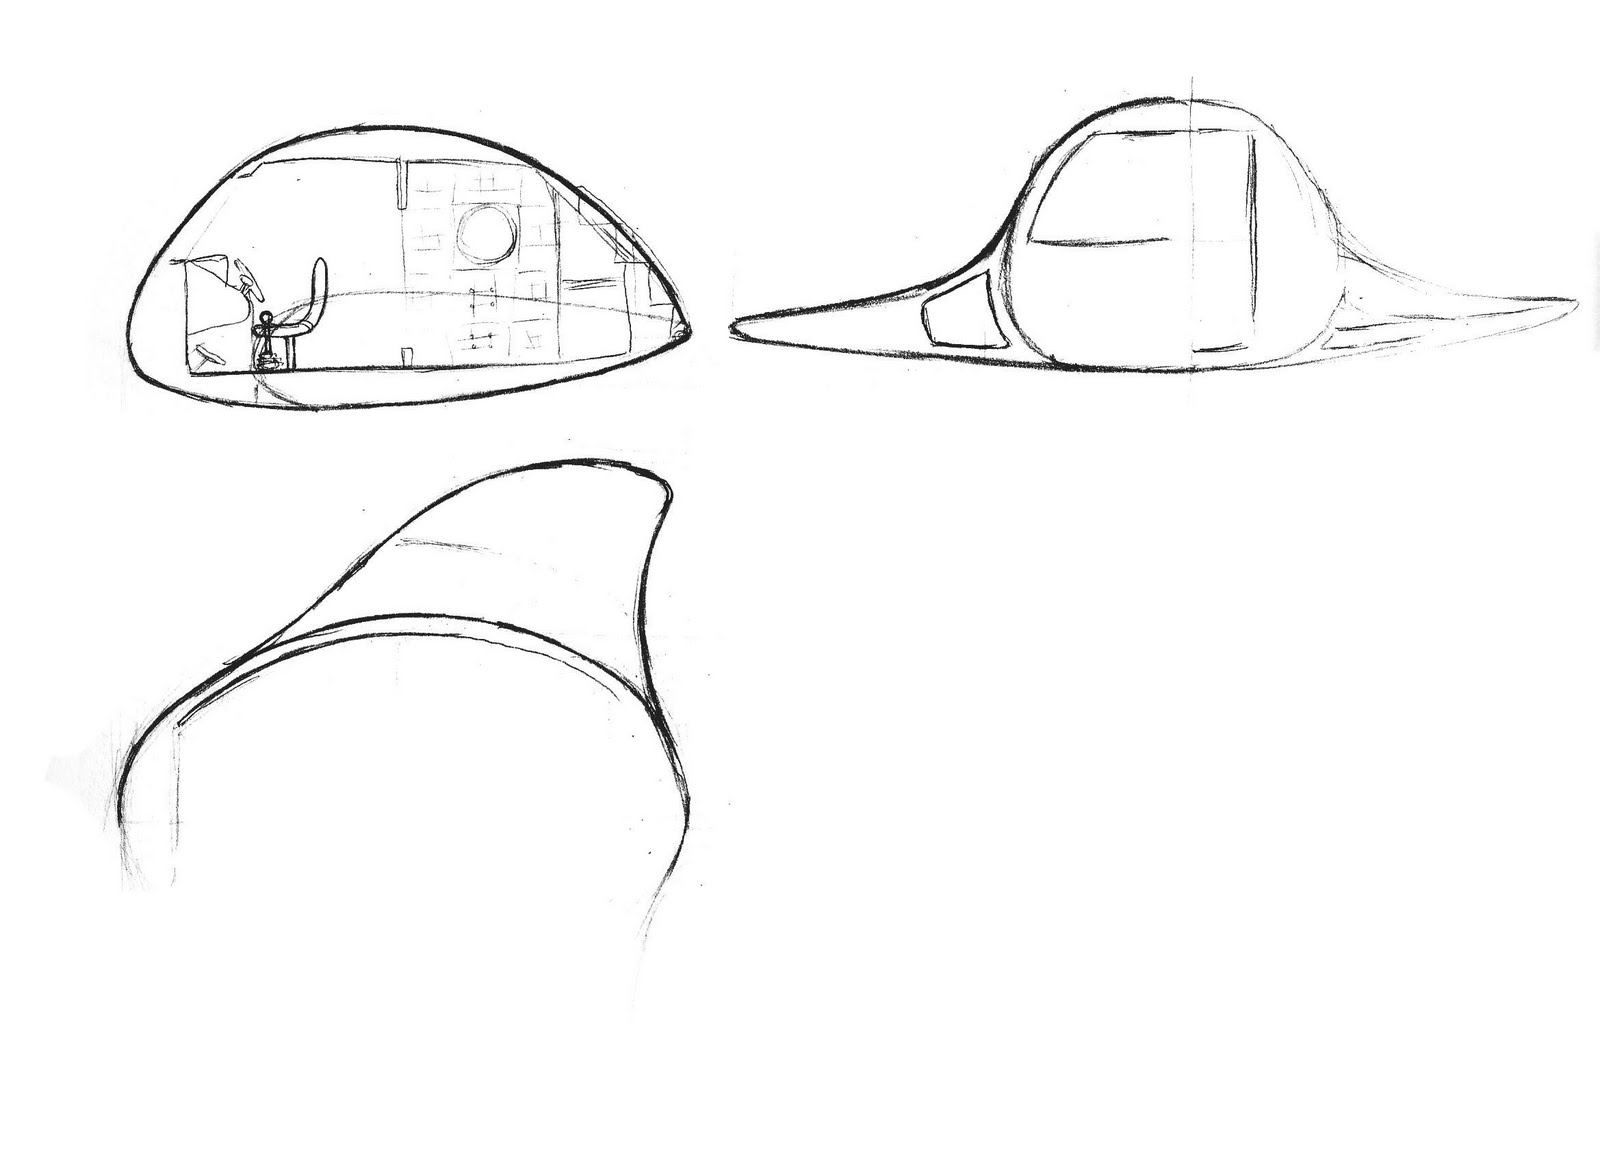 This is the quick crappy sketch I used to model the space craft. Its not very imaginative or interesting….. but…. It proved a bugger to model!
 Modelling part 1; tried a few different things to begin with, but finally settled on using a polygon cylinder as the basis for the craft. Manipulated that to get roughly the right shape and then used two poly spheres, deleting half the faces on each, to kind of cap off the cylinder. The wing, again, took several frustrating attempts. I tried extruding from the existing part of the model, which seemed like the obvious choice to start with, but, I just couldn’t get it right. Instead I used a poly cube as the starting point. Keeping the leading side flat, I moved the vertices closest to the main part of the craft to match them to the shape and curve of that with the intention of combining the two parts and then merging the vertices. (does that make sense?). I then extruded from the straight faces to create the wing shape. Not entirely happy with the result, but it was starting to annoy me!
 Top view of the stupid bloody thing…..
 After joining the wing to the ship I tried to create a kind of, erm, I guess an air intake duct. This also proved problematic. Ended up settling with what you see in the pic after spending far too long on that part…. Bloody thing…..
 Stay tuned for more updates from both me and Rob!
ok.... its done in Maya.... sure you gathered that.
there were severalother started and scraped when modelling wasnt going right and discovered better ways of doing things part way through... so... i think this is like the 3rd or 4th attempt at a model. started out with polygon sphere and...erm....whats it called...? will open maya and have a look... one sec... CYLINDER... dumb fuck...yeah... started out with polygon sphere and cylinder for the main shell of the helmet. deleted half the faces on the sphere and the top face of the cylinder and then joined the vertices. pissed about with it and stuff till got basic helmet shape. then tweaked
vertices at front in order to get rough shape for the opening......then.. i think i deleted the faces....leaving the opening sort of thing....
erm........ also deleted bottom of the cylinder so i had a sort of basic
shell.then duplicated it and scaled it down to fit inside existing one so i had two which i would then join together to create a thikness to it. Cant remember what i did with that.....think i may have extruded edges and then merged vertices..... was a couple weeks back now... either way... im sure there would have been a better and quicker way of doing it... but im crap on maya...so... thats what i ended up doing...or something along those lines anyway...
erm.....added some edges and stuff to get sharper lines round the base and the front opening. think thats about it for the main shell...
then i did the...erm... the bits on the side... cant remember what they are called... but they are the covers on a motor cycle helmet that you sometimes get to cover the mechanism of the visor...they pissed me off...couldnt get the right shap on them...got close and stuck with what i had though. they started off as polygon cubes...did one then mirrored it sort of thing...then the visor......cant remember how i did that... think it started as a cube also...narrowed it down. manipulated it and so ontill got a close enough shape anyway...canceled or froze transformations onit...something along those lines anyway... and moved the pivot point for the object central to where the opening mechanism would be...so... erm... it opens from the correct place...
hardest part was the muzzel type added nose bit on the front...i was working from a quick sketch...and..well... 2d didnt translate too well to 3d..... (might add the sketches in attachments too actually...see what i worked from...) anyway... the final compramised one i used started off as a cube and sides were extruded from that...took a while and got to the point where settled for what you see on the images.
then...final bit of modelling was the buck teeth that project from the
muzzle at front of helmet... simple shape... started from a cube... simple
as...
muzzle also has the object pivot point moved... bit pointless ... but... when the visor opens and shuts it was passing trough the nose... so... if it was to be animated... when the visor starts to lift up the nose bit moves forward slightly to alow it to open uniterupted. stupid i know. did several shots of helmet...at various stages of openess... if you take a second glane you may notice that the nose is tipped forward in some of the pics...but anyway... not important i guess :Psoooo what else...?
... oh yeah.. i made a hastey search for some online lessons on adding textures
or colours or whatever to the model... first time i tried it and...well...
it wasnt terribly good....as you can see...not sure i did it right and when it
came to the...erm...whats it called...?... UV texture editor...? anyway...
whatever it is... the shapes were all over the place and it was hard to
distinguish what was what part... didnt look how i expected basically...so
struggled to do the photoshop bit... was a bit of guess work involved in
that...so... deffinately something i need to look up further... but
anywho... i digress....
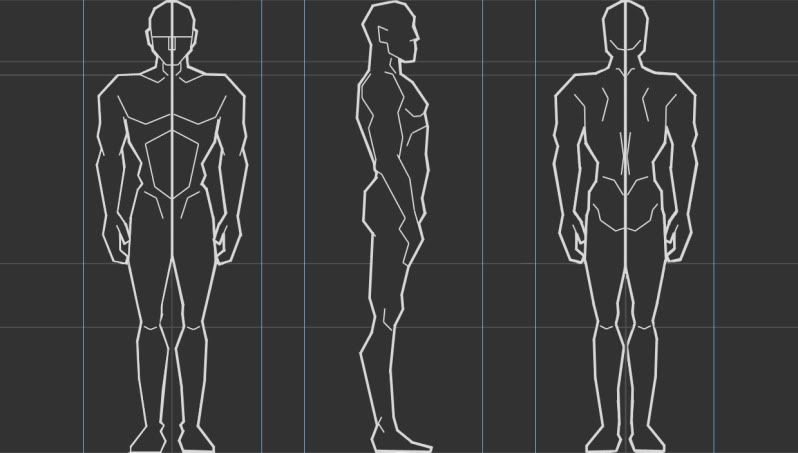
so that was the basic model...decided to see what it would look like on a character....as i havent got the "bunny-man"
character done.... (just a quick sketch of him from last year sometime)... i used the Moom downloaded character. just a couple of quick examples of the helmet in use... also attached... anyway... bout it i think... oh...erm... time wise...with restarts and trying to work out the texture bit while following instructions on line...think it worked out to something like 8 hours or something stupid... too long though... for such a simple model... just goes to show how little i used maya doesnt it :S
 Its a pretty simple polygon affair which I created using block modelling techniques. I wish I had more time to add in details and the actual model itself isn't very clean. However, I've learnt a lot and can only improve after this!
 The best bit is that Sculptris is 100% FREE, and avaliable for download here. Download it, have a play and see what you can do! Attached is a really rough Moria Orc which I modelled in about 20 minutes. Pretty naff but it shows the potential that the software has!
 Direct link to the higher resolution image can be found here. If anyones interested, I will be continuing my tutorials but in Blender, check my Youtube channel out!


